I finally finished my most recent T-Shirt quilt! I made it for a former boss, who is totally obsessed with the Dodgers! These are all shirts from her collection (no where near the whole collection though- that would have made a massive quilt!)
This is the first quilt I have ever finished with binding for the edge. It turned out ok, but not my favorite way to finish. I have another quilt in the works that requires a binding as well.
Thursday, August 9, 2012
Thursday, June 7, 2012
Gallery wall
Yesterday I posted a Decorated Cross that I made to add to my gallery wall. Well, here is the gallery wall!
This entire wall of art cost me less than $30!! Here's the breakdown:
1- clock, purchased at BigLots for $12
2-Picture of my in-siblings and niece, gift, $0
3- Painting by my husbands grandma, $0
4- Art my husband had $0
5- A framed card in a frame I had $0
6- A picture of my sister and I $-0
7- Signlanguage alphabet (made by me) in a frame purchased for $4
8- A drawing by my father, frame cost $6
9- Packaging from a Dickies shirt, frame cost $4
10- Decorated cross, $3
11- A drawing my husband had, $0
12- Wedding photo of my husbands parents, $0
13- Art from Thailand (souvenier from my uncle), $0
14- A painting by my best friend in a frame I had, $0
15- A painting I bought at goodwill for 50 cents!!! $.50
Here's a closeup of #7-
And a closeup of #5
This entire wall of art cost me less than $30!! Here's the breakdown:
2-Picture of my in-siblings and niece, gift, $0
3- Painting by my husbands grandma, $0
4- Art my husband had $0
5- A framed card in a frame I had $0
6- A picture of my sister and I $-0
7- Signlanguage alphabet (made by me) in a frame purchased for $4
8- A drawing by my father, frame cost $6
9- Packaging from a Dickies shirt, frame cost $4
10- Decorated cross, $3
11- A drawing my husband had, $0
12- Wedding photo of my husbands parents, $0
13- Art from Thailand (souvenier from my uncle), $0
14- A painting by my best friend in a frame I had, $0
15- A painting I bought at goodwill for 50 cents!!! $.50
Here's a closeup of #7-
And a closeup of #5
Wednesday, June 6, 2012
Decorated Cross
I purchased this unfinished cross at Walmart for less than $3 to fill a hole in my gallery wall... ( yes, I have a gallery wall... I know how "trendy" they are, but I put one up to save money on decoration costs! I basically used as many pieces of artwork of mine and my husbands that I could find and suplemented those with some other inexpensive pieces and some that I made! Like this one...)
I painted it brown, and used mod podge to glue a thrifted map to the top layer. (The map was not a normal city map, and I'm not sure where it was for, but it had foreign sounding names. I bought two at goodwill for 99cents each!)
And I used some gold glitter glue around the outer edge to add some sparkle, and to help it pop a little.
I painted it brown, and used mod podge to glue a thrifted map to the top layer. (The map was not a normal city map, and I'm not sure where it was for, but it had foreign sounding names. I bought two at goodwill for 99cents each!)
And I used some gold glitter glue around the outer edge to add some sparkle, and to help it pop a little.
Monday, June 4, 2012
Americana Trinket Shelf (or Junk Drawer Art)
Here is is with the other small art piece my husband found for me at goodwill.
Monday, May 21, 2012
Ugly Tea Towels to Reusable bag
A few months ago I was wandering through my local Dollar Tree (one of my favorite stores!) and stumbled upon some really fabulously ugly tea towels.
They called, no, screamed my name. I mean, who could pass up a pink tea towel with a strange soup print on it? I still can't get over how glorious and weird the print is. So there I was giggling to myself in the middle of the aisle wondering what I could do with such a treasure. I bought 3. One I sent to my best friend, who was just as amused by its kitchyness, and the other two sat around for a while. I washed them.... and stared at them... and waited a few weeks for inspiration to hit me. those few weeks turned into months and then it hit me... a reuseable bag! Then I could strut my stuff at the grocery store with a little beauty made of odd soup print fabric. I used another bag I had as a template, its basically two rectangles sewn together with the bottom corners squared up.
I added a piece of cardboard to the bottom for stability.
Saturday, April 28, 2012
Resizing a T-shirt: A Tutorial
T shirts are wardrobe staples. they come in all shapes, sizes, colors, fits and prints. but what happens when you have a tshirt that you LOVE, but its way too big, and seriously unflattering? You resize it! Give a more feminine fit to your boyfriend's old band shirts, the incredibly cool oversized thrift store find that you couldnt pass up, a plain clearance tshirt you found in the men's section at target for $1.61, or the big baggy work shirts you were issued on your first day, and happen to look terrible in. Heres how.
Go to your closet and find your favorite t shirt. the one that fits you like a dream,(the one thats getting a little holey, but you can't part with...) And your big shirts that need to be resized.
Lay your big shirt out on the floor (or table) making sure that it is smoothed out and seams are matching.
Lay your perfect shirt on top, lining up the shoulder seams.
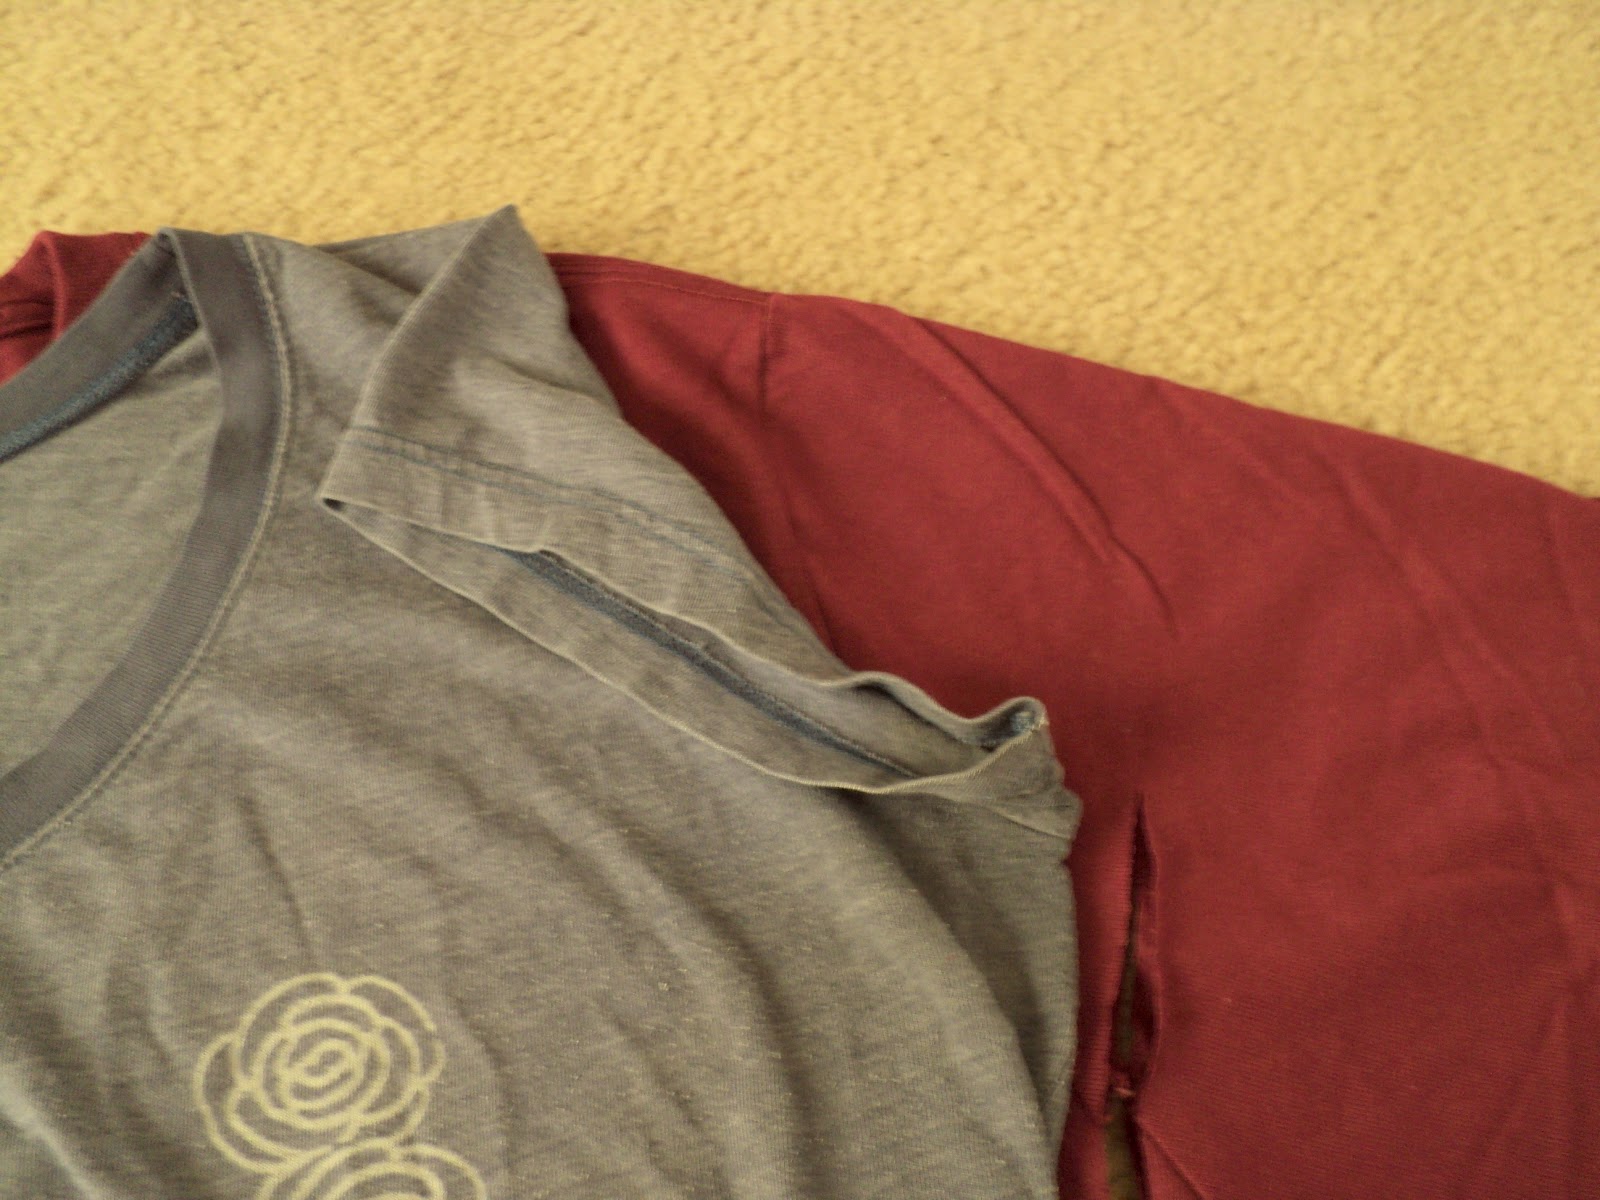
Cut the larger shirt (through both layers) about 1/2 inch away from the seam of the smaller shirt.
Stop when you get to the end of the side seam.
Fold the sleeve back so you can see the curve of the arm hole. use as a guide to cut the arm hole.
Fold the shirt in half, matching at the neckline and cut the other side. save the sleeve pieces.
Match the sleeve hem of the smaller shirt to the sleeve of the larger. use the top of the sleeve as the guide- you will be cutting the bottom to make a new underarm seam.
Go to your closet and find your favorite t shirt. the one that fits you like a dream,(the one thats getting a little holey, but you can't part with...) And your big shirts that need to be resized.
Lay your big shirt out on the floor (or table) making sure that it is smoothed out and seams are matching.
Lay your perfect shirt on top, lining up the shoulder seams.
Cut the larger shirt (through both layers) about 1/2 inch away from the seam of the smaller shirt.
Stop when you get to the end of the side seam.
Fold the sleeve back so you can see the curve of the arm hole. use as a guide to cut the arm hole.
Fold the shirt in half, matching at the neckline and cut the other side. save the sleeve pieces.
Match the sleeve hem of the smaller shirt to the sleeve of the larger. use the top of the sleeve as the guide- you will be cutting the bottom to make a new underarm seam.
Cut the larger sleeve using the smaller one as a guide. fold the smaller shirt back as needed to see the curve. Make sure to allow 1/2 inch seam allowance, just like you did for the body.
Now the fun part!
Sewing your shirt together:
Right sides together, pin your sleeve to the arm hole of the shirt, matching both ends and center. Strech slightly as needed.
Sew with a straight stitch and 1/2 inch seam allowance.
once both sleeves are sewn in, match up side seams, right sides together, and pin.
Then sew sides seams together using a 1/2 inch seam allowance.
Turn shirt right side out, and wear it with pride!
Linked Here
Monday, April 23, 2012
A Goodwill find, turned art!
My first apartment was incredibly small. One bedroom, and no wall space. So in turn, I had very little art and decorations. I managed with decorative throw pillows and a few knicknacks. Moving to a new, bigger apartment (in a new state, no less!), has afforded me with more wallspace, but a vastly depleted budget. Finding ways to decorate on a budget has been a fun challenge. I was recently in my local Goodwill, and I found these little gems:
Three wicker panels for $1.99! Check out the texture of these
I wanted to paint on them, but was unsure what... Since there was 3 I thought I could do a tryptich, a silhouette possibly. I thought about the oh so popular birds on a wire, but didn't think my husband would be too keen on that. Then it came to me! I could do a boat of some sort. My husband was in the Navy, and boats are manly, and I love nautical anything. So here is what I came up with:
I found an image I liked online and used black acrylic paint and freehanded the image onto the panels. I Hung it up above the dining room table (which my husband claimed as his "office"). It helps to fill the wall space and add some color on the bare white walls!
Three wicker panels for $1.99! Check out the texture of these
I wanted to paint on them, but was unsure what... Since there was 3 I thought I could do a tryptich, a silhouette possibly. I thought about the oh so popular birds on a wire, but didn't think my husband would be too keen on that. Then it came to me! I could do a boat of some sort. My husband was in the Navy, and boats are manly, and I love nautical anything. So here is what I came up with:
I found an image I liked online and used black acrylic paint and freehanded the image onto the panels. I Hung it up above the dining room table (which my husband claimed as his "office"). It helps to fill the wall space and add some color on the bare white walls!
Subscribe to:
Posts (Atom)