Monday, May 21, 2012

Ugly Tea Towels to Reusable bag

A few months ago I was wandering through my local Dollar Tree (one of my favorite stores!)  and stumbled upon some really fabulously ugly tea towels.


They called, no, screamed my name. I mean, who could pass up a pink tea towel with a strange soup print on it? I still can't get over how glorious and weird the print is. So there I was giggling to myself  in the middle of the aisle wondering what I could do with such a treasure. I bought 3. One I sent to my best friend, who was just as amused by its kitchyness, and the other two sat around for a while. I washed them.... and stared at them... and waited a few weeks for inspiration to hit me. those few weeks turned into months and then it hit me... a reuseable bag! Then I could strut my stuff at the grocery store with a little beauty made of odd soup print fabric.  I used another bag I had as a template, its basically two rectangles sewn together with the bottom corners squared up.


I added a piece of cardboard to the bottom for stability. 

Saturday, April 28, 2012

Resizing a T-shirt: A Tutorial

T shirts are wardrobe staples. they come in all shapes, sizes, colors, fits and prints. but what happens when you have a tshirt that you LOVE, but its way too big, and seriously unflattering? You resize it! Give a more feminine fit to your boyfriend's old band shirts, the incredibly cool oversized thrift store find that you couldnt pass up, a plain clearance tshirt you found in the men's section at target for $1.61, or the big baggy work shirts you were issued on your first day, and happen to look terrible in. Heres how.

Go to your closet and find your favorite t shirt. the one that fits you like a dream,(the one thats getting a little holey, but you can't part with...) And your big shirts that need to be resized.


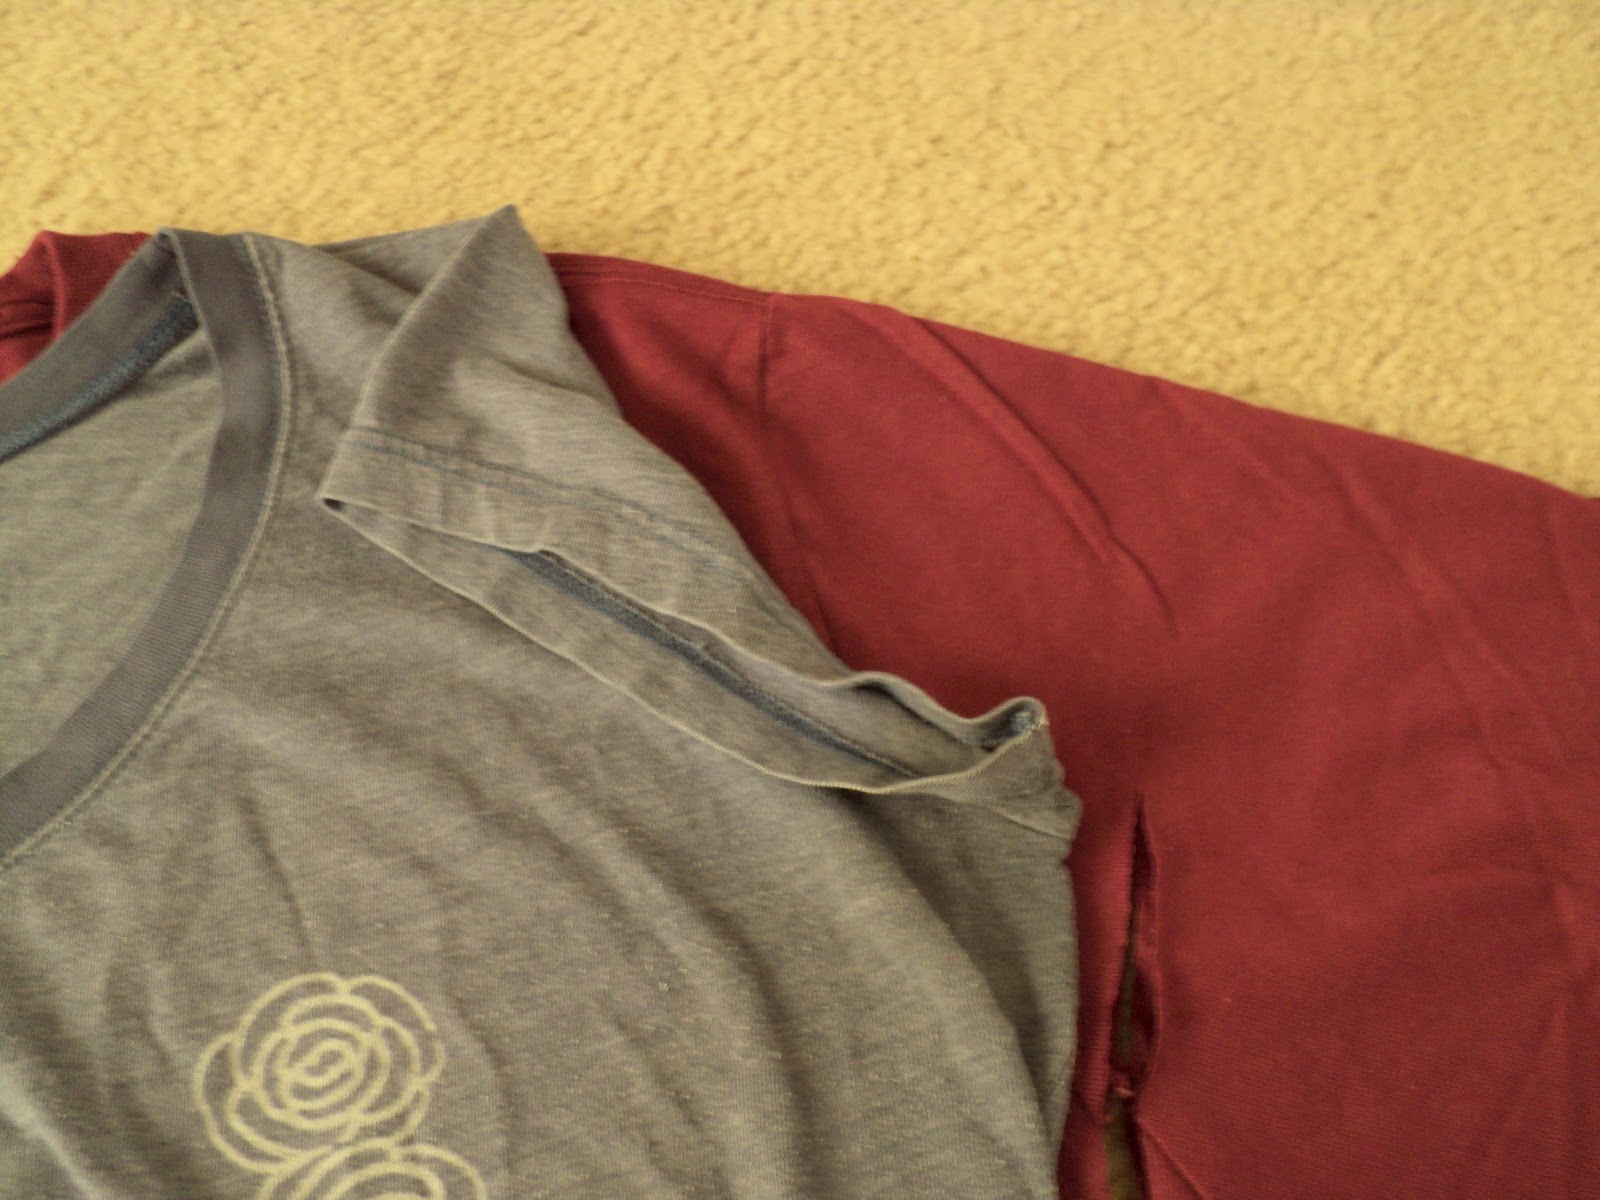
Lay your big shirt out on the floor (or table) making sure that it is smoothed out and seams are matching.

Lay your perfect shirt on top, lining up the shoulder seams.


Cut the larger shirt (through both layers) about 1/2 inch away from the seam of the smaller shirt.


Stop when you get to the end of the side seam.

Fold the sleeve back so you can see the curve of the arm hole. use as a guide to cut the arm hole.


Fold the shirt in half, matching at the neckline and cut the other side. save the sleeve pieces.

Match the sleeve hem of the smaller shirt to the sleeve of the larger. use the top of the sleeve as the guide- you will be cutting the bottom to make a new underarm seam.

Cut the larger sleeve using the smaller one as a guide. fold the smaller shirt back as needed to see the curve. Make sure to allow 1/2 inch seam allowance, just like you did for the body.


Now the fun part!
Sewing your shirt together:

Right sides together, pin your sleeve to the arm hole of the shirt, matching both ends and center. Strech slightly as needed.


Sew with a straight stitch and 1/2 inch seam allowance.


once both sleeves are sewn in, match up side seams, right sides together,  and pin.
Then sew sides seams together using a 1/2 inch seam allowance.
Turn shirt right side out, and wear it with pride!


Linked Here

Monday, April 23, 2012

A Goodwill find, turned art!

My first apartment was incredibly small. One bedroom, and no wall space. So in turn, I had very little art and decorations. I managed  with decorative throw pillows and a few knicknacks. Moving to a new, bigger apartment (in a new state, no less!), has afforded me with more wallspace, but a vastly depleted budget. Finding ways to decorate on a budget has been a fun challenge. I was recently in my local Goodwill, and I found these little gems:


Three wicker panels for $1.99!  Check out the texture of these


I wanted to paint on them, but was unsure what... Since there was 3 I thought I could do a tryptich, a silhouette possibly. I thought about the oh so popular birds on a wire, but didn't think my husband would be too keen on that. Then it came to me! I could do a boat of some sort. My husband was in the Navy, and boats are manly, and I love nautical anything. So here is what I came up with:


I found an image I liked online and used black acrylic paint and freehanded the image onto the panels. I Hung it up above the dining room table (which my husband claimed as his "office"). It helps to fill the wall space and add some color on the bare white walls!

Tuesday, January 31, 2012

Sequin Wall Art

One major defining factor of most crafters is the massive accumulation of craft supplies that you can't bear to part with, but can't find an exact use for. I have quite a large collection of loose sequins, among other things,  that I bought for some reason, but now have a major excess of. This idea popped into my head while I was planning the decor of my craft room. It is time consuming, but very easy to do. The result is a bright and sparkly piece that will liven up any wall!


All you need is a canvas, some glossy ModPodge, sequins, and a paintbrush.
Start  by coating your canvas with a thick coat of Mod Podge.


Sprinkle sequins on to the wet ModPodge. Since sequins are not completely flat, the thicker the glue the better.


Add more sequins to fill in any big gaps, and allow to dry completely.


Add more ModPodge to gaps, overlapping the edges of surrounding sequins and place sequins in gaps by hand to fill the empty spaces.


When the entire canvas is covered and all big gaps are filled, allow to dry and then coat the entire canvas with a thick coat of ModPodge.


This will take a day or more to completely dry. Once it has dried, it's ready to hang!

Tuesday, November 8, 2011

T-Shirt Quilts

T-Shirt quilts are some of my favorite things to make. Each quilt is unique and tells a story. I have made at least 10 for various people. I love making T-Shirt quilts becuase of the constant variety of shirts colors and designs. No two quilts are ever exact and it makes it a fun challenge to place the shirts to make the quilt visually pleasing. 

The first t-shirt quilt I made was made from shirts of a man who had died for his widow. It was basic, made of all uniform squares from different types of shirts- polos, hawaiian shirts and dress shirts. I was told to leave the stains in tact, and to make the best use of the shirts, so I included plackets and pockets as well, to make it obvious that it was made from shirts. The widow was touched by the quilt, and the customer (her granddaughter) gave me a huge hug and a tearful "thank you" for making her grandmother something so meaningful.

Most of the T-shirt quilts are made from high school and college tshirts, representing sports, clubs and greek organizations.  This quilt was made for an ASU graduate who had played softball. It was a HUGE quilt!


This quilt was for the same customer, different daughter. This she is a  Santa Clara graduate and played Water Polo.

The next quilt was done for my former boss. Her quilt contains band t-shirts from concerts she went to, company t-shirts from her business, and various shirts she collected from vacations, as well as some other shirts with cool designs that she wanted included.

I am working on another quilt for her as well, out of all LA Dodgers shirts collected over the years.

This is my most recent T-Shirt quilt made for a former UCLA Tri Delta sorority girl.

I wish I had pictures of all of the quilts I have done over the years, but this is a just sampleing.  I have one in the works for myself, though its a bit more complicated of a design, and probably won't be done for quite some time! I have a few more projects that need to get done first!

Saturday, August 27, 2011

Hooded Towel


I've been making these hooded towels for a while now. They make great gifts for kids, and they are so simple to make! All you need is a bath towel, a hand towel and 1/4 yard of 45" wide fabric.

Wednesday, July 27, 2011

Bathroom Towels

This is a very easy way to jazz up plain towels. Just a little fabric and ribbon sewn to the bottom!